NetBeans Installation#
Three Main Steps#
Install Open JDK
Set the Environmental Variables in Windows
Install Apache NetBeans.
For fresh installs, it has to be done in this order.
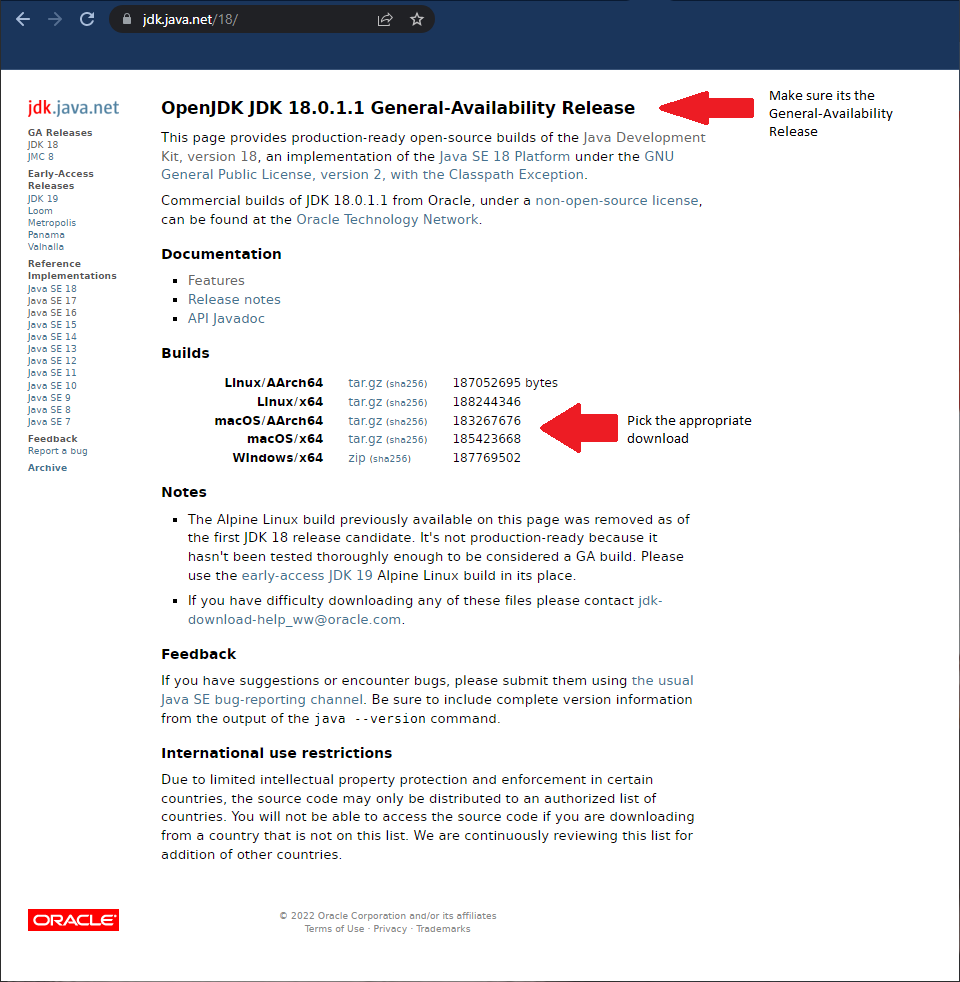
Install Open JDK#
Go to https://openjdk.java.net/Click on the version you wish to install.
Uncompress the zip or gz file. For Windows, copy the java-xx file to c:\Program Files in a folder called java. C:\Program Files\Java\java-xx.
Set the Environmental Variables in Windows#
Depress the Windows Key and release then type ENV. This will open the window to change the environmental variables.
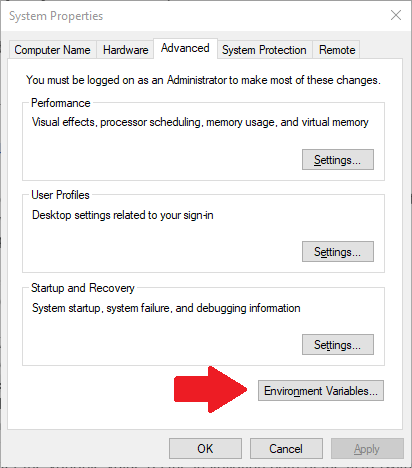
Set a PATH: Select Control Panel and then System.
Click Advanced and then Environment Variables.
Add the location of the bin folder of the JDK installation to the PATH variable in System Variables.
Click Path in the System Variables (bottom half), click edit, and browse. Browse to the bin folder and click ok.”C:\Program Files\Java\jdk-xx\bin”
Set JAVA_HOME:
Under System Variables, click New.
Enter the variable name as JAVA_HOME.
Warning
JAVA_HOME has to be in all caps.
:::

  3. Enter the variable value as the installation path of the JDK (without the bin sub-folder)
  4. Click OK.
  5. Click OK.
Install Apache NetBeans#
Click the download button.
Install
Updated May 2022